BlastStation-Workgroup
Welcome
Quick Start Guide
Quick Start
Data Input
Enter Job
Job Control Panel Operation
Database
Create database
Remove and Share database
Results
Navigate Results
Quick Start
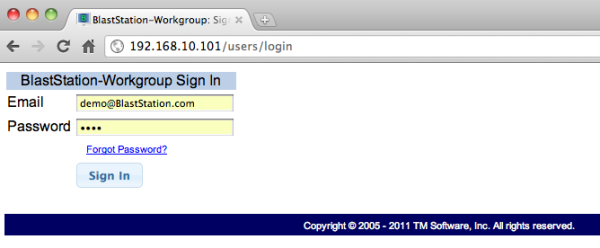
1. Sign In
Launch supported browser and access BlastStation-Workgroup server. For example, access http://192.168.10.101. Then, type in your Email and Password and click Sign In button. Google Chrome is used in this Help.
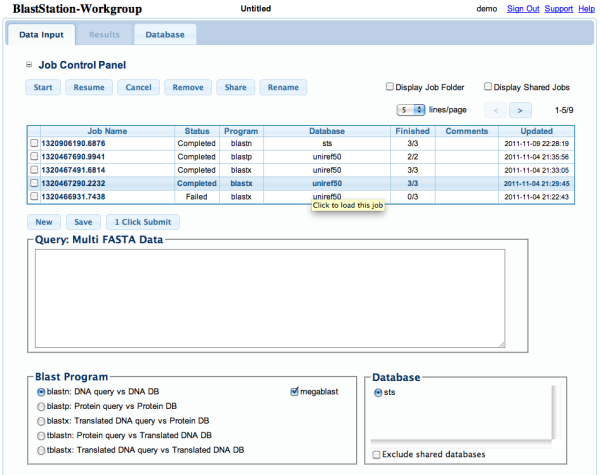
Screen below will be shown. This is the Data Input pane.
2. Create Database
Click Database tab and go to the Database pane to create local database.
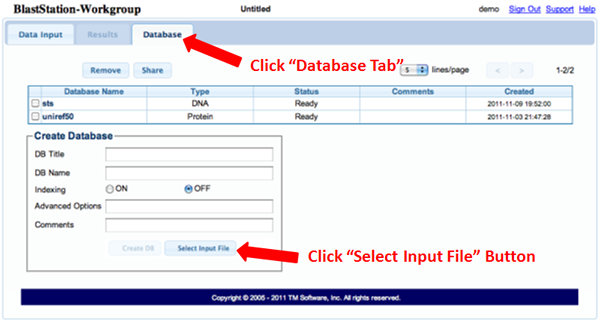
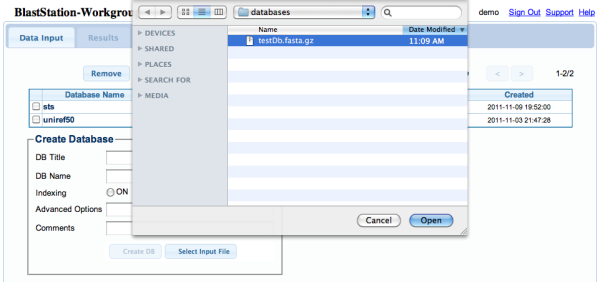
Click "Select Input File" button and select FASTA or FASTQ file. Not only plain text file but also gzipped, zipped, and compressed files can be selected.
DB Name is automatically entered. Click "Create DB" button.
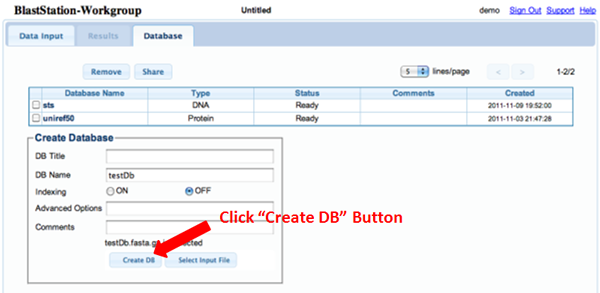
Selected Input file will be uploaded to the server, displayed in the top table and the database will be created. When the status becomes "Ready", it is available to use.

3. Submit Blast Search Job
Let's click Data Input tab and go back to the Data Input pane.
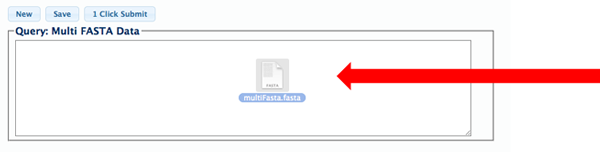
Drag and drop multi FASTA file in your computer to the Query: Multi FASTA Data field. You can also copy and paste multi FASTA data to the Query field. After that, click the outside of Query: Multi FASTA Data field. Sample FASTA data is found here.
Select available Blast Program and Database.
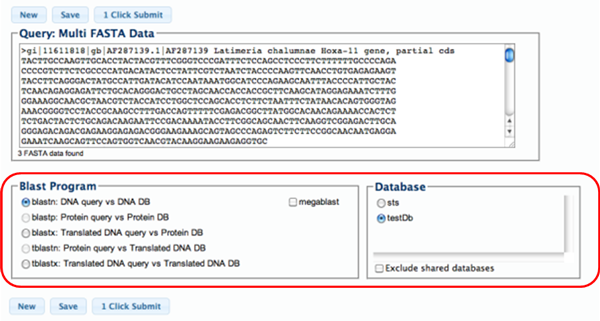
Click "1 Click Submit" button. Blast search starts and new job will be shown in the Job Control Panel located on the top of the page.
When Blast search finishes, Status will be changed to Completed.

You can submit multiple search jobs and once these search jobs are shown in the Job Control Panel, you can Sign Out. BlastStation-Workgroup server will perform blast searches one by one and next time you sign in, all or some of them are completed.
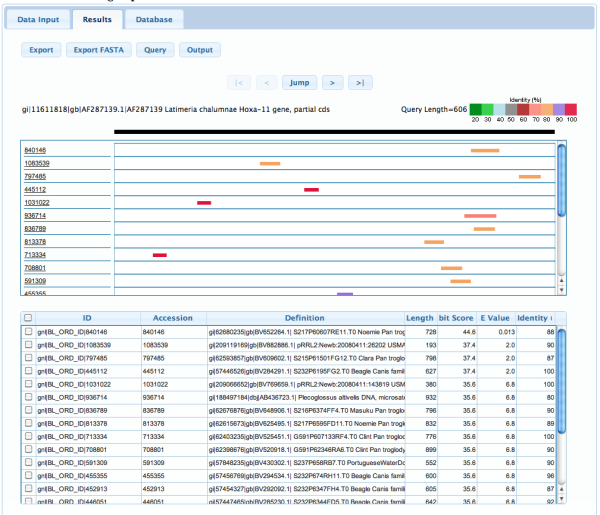
4. Examine Blast Search Results
Click job in Job Control Panel.

Blast search results will be shown in the Results pane.